Lighting a scene
In After Effects, a light is a type of layer that shines light on other layers. You can choose from among five different types of lights—Parallel, Spot, Point, Ambient, and Environment—and modify them with various settings. Lights, by default, are directed toward a point of interest, which is the focus area of the scene. After Effects creates a default light when you create a 3D layer, but you have more control over lights you create yourself. Lights affect only 3D objects so won’t have any effect on the background.
You’ll add lighting and adjust the material properties to make the scene more sophisticated.
Adding a spotlight
First, you’ll add a spotlight to add some depth to the scene.
- Go to 4:29, the last frame in the time ruler.
- Deselect all layers, and then choose Layer > New > Light.
- In the Light Settings dialog box, do the following:
• Name the layer Spotlight.
• Choose Spot from the Light Type menu.
• Set Color to a white tint (we used R=248, G=249, B=242).
• Make sure Intensity is set to 100% and Cone Angle to 90 degrees.
• Make sure Cone Feather is set to 50%.
• Click OK to create the light layer.
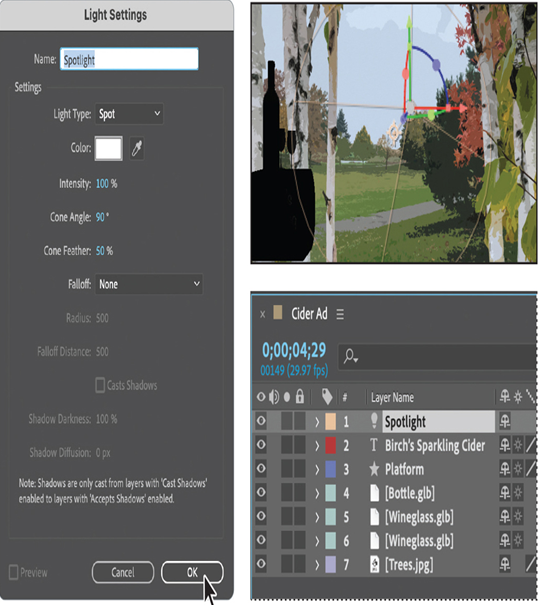
In the Timeline panel, the light layer is represented by a light bulb icon ( ).
In the Composition panel, a wireframe illustrates the light’s position, with a cross-hairs icon ( ) representing the point of interest.
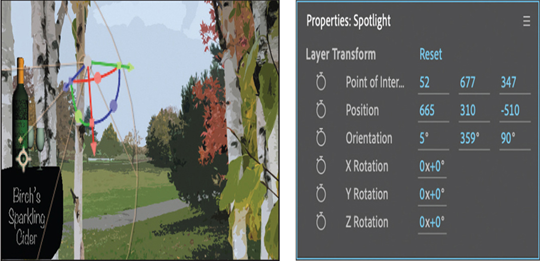
- Make sure the Spotlight layer is selected in the Timeline panel.
- In the Properties panel, do the following:
• Change the Point of Interest to 52, 677, 347.
• Change the Position to 665, 310, -510.
• Change the Orientation to 5, 359, 90.
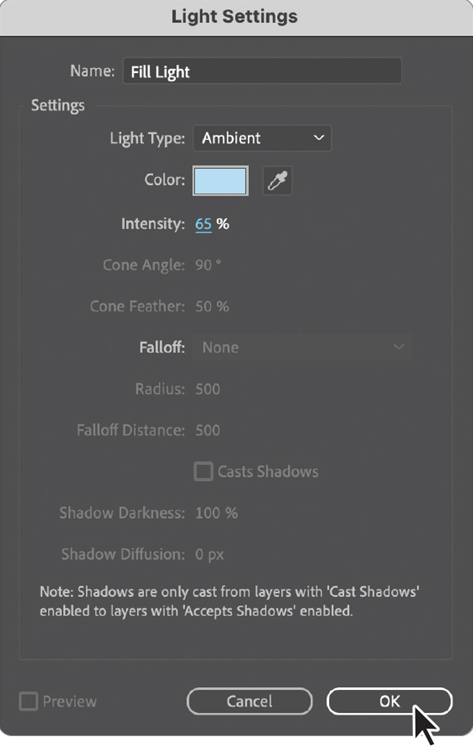
Creating an ambient light
The spotlight adds some drama, but it isn’t enough on its own. When you created a light, the default light was disabled. You’ll add an ambient light to light the entire scene.
- Choose Layer > New > Light.
- In the Light Settings dialog box, do the following:
• Name the layer Fill Light.
• Choose Ambient from the Light Type menu.
• Set the Color to a light blue (we used R=179, G=221, B=244).
• Set Intensity to 65%.
• Click OK to create the light layer. - Choose File > Save.