- When the second pawn is in place, scrub through the clip. The cloned pawn is stationary while the rest of the scene moves; it isn’t in sync with the other objects. You’ll use tracking data to fix the problem.
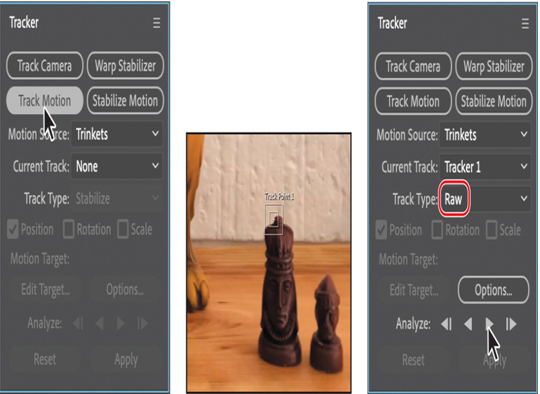
- Go to 3:20. With the Trinkets layer selected, open the Tracker panel, and click Track Motion.
The cloned pawn disappears. Don’t worry; it’s still there.
Note
You’ll learn more about using track points in Lesson 14.
- Select the Selection tool, and then drag the track point (the empty portion of the inner box) to the top of the queen’s head for the best tracking results.
- Select Raw for Track Type, and then click the Analyze Forward button.
- In the Timeline panel, go to 3:20, the beginning of the footage.
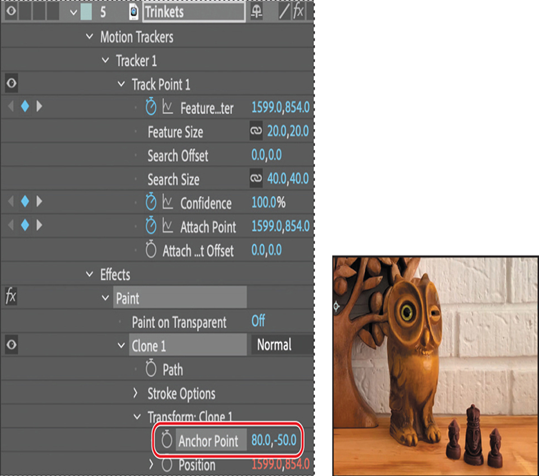
- Expand the Trinkets layer > Motion Trackers > Tracker 1 > Track Point 1.
- In the Trinkets layer, expand Effects > Paint > Clone 1 > Transform Clone 1.
- Drag the pick whip for the Transform: Clone 1 Position property to the Track Point 1: Attach Point property, and release it. (You may need to enlarge the Timeline panel to see both properties at once.)
Note
If you used multiple strokes to paint the cloned pawn, you’ll need to drag the pick whip from the Position property for each clone (Clone 1, Clone 2, etc.) to the Track Point 1 Attach Point.

The expression you created ties the position of the cloned pawn to the tracking data you created for the clip earlier in the lesson. The pawn will travel with the image.
- Click the Composition: Collectibles tab to bring the Composition panel forward so you can see the cloned pawn.
The pawn is in the wrong place. You can correct its relationship to the other objects by adjusting its anchor point.
- Adjust the Transform: Clone 1: Anchor Point property until the pawn is positioned next to the queen. We used 80, -50.
You might need to zoom out to see where the pawn is while adjusting the anchor point values. Your values will probably be different from ours.
- Choose Fit from the Magnification Ratio pop-up menu so that you can see the whole composition.
- Scrub through the clip to verify that the pawn is positioned properly. When you’re satisfied that it is, close the Layer panel, hide the properties for all layers in the Timeline panel, and restore the Timeline panel to its original size.
- Choose File > Save to save your work.
Darkening a scene
The third scene is looking pretty good. You’ll add an image of the business logo and adjust the brightness of the footage to make the text stand out clearly.