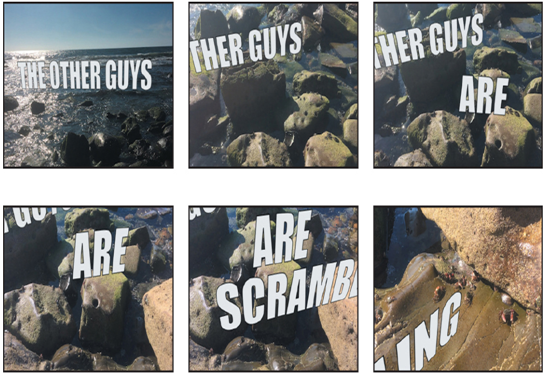
You created the initial text for the advertisement. Now you need to perform the same tasks to create the rest of the ad. You’ll use the same steps to create each label, but because the text appears in different places in the video and needs to shift in relationship to the scene, you’ll need to use different position, orientation, and scaling values.
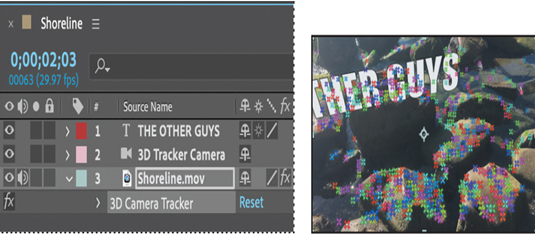
- Go to 2:03.
- In the Timeline panel, select the Shoreline.mov layer, and press E to reveal its effects. Then select the 3D Camera Tracker to make it active.
Note
Make sure you select the 3D Camera Tracker effect in the Shoreline.mov layer, not the 3D Tracker Camera layer.
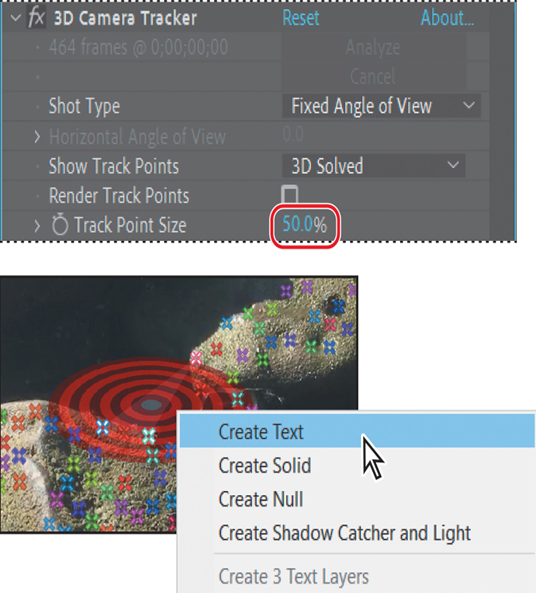
- In the Effect Controls panel, change the Track Point Size value to 50% so you can see the track points more clearly.
- Make sure the Selection tool is selected. Then, in the Composition panel, hover over an area so that the red target lies flat across the rocks, right-click or Control-click the target, and choose Create Text.
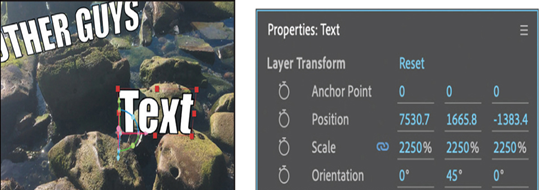
- Select the Text layer in the Timeline panel and then rotate the text as shown. (Our Orientation values are 0, 45, 0.)
- Double-click the Text layer to make it editable, and then type ARE in the Composition panel. Click the ARE layer to exit text-editing mode.
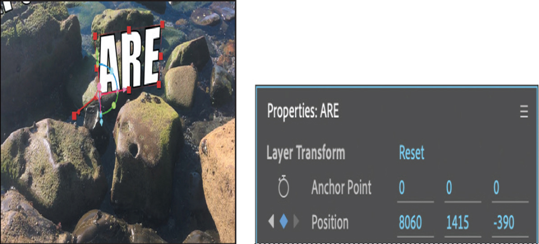
- Click the stopwatch icon ( ) for the Position property to create an initial keyframe.
- Go to 2:29, and use the Selection tool to move the text so that its position is similar to the text in the image below. Your values probably differ from ours.
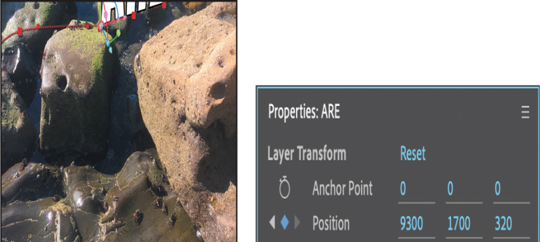
- Go to 4:14. Use the Selection tool to drag the composition so that the bottom of the text is visible, as shown in the image below. (Use the Hand tool ( ) to move it so that you can see the text box outside the frame, if necessary.) Or, you can adjust the Position values. Your values will be different than ours.
- Hide the properties for the layer. If you used the Hand tool to reposition the image, move it back now. Then select the Selection tool, and manually preview the text animation.
- Go to 4:14, and activate the 3D Camera Tracker track points again by selecting the Shoreline.mov layer in the Timeline panel, and then selecting either 3D Camera Tracker under the Shoreline.mov layer or 3D Camera Tracker in the Effect Controls panel.
- With the Selection tool ( ), select a target for a flat plane against the large rock on the right. Then right-click the target, and choose Create Text.
- Select the Text layer in the Timeline panel. Rotate the text so it’s upright and angled slightly, as shown below. (Our Orientation values are 0, 45, 10.) Change the Scale property to 2000%.
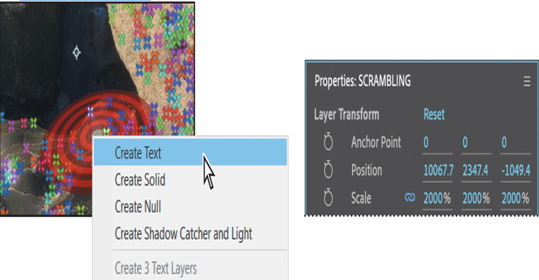
- Double-click the Text layer, and then type SCRAMBLING in the Composition panel.
- Go to 3:10, where this text should first be visible. Use the Selection tool to drag the text so that it starts below “ARE” and continues offscreen. You can also use the Rotation tool or the 3D Gizmo. When you’re satisfied with its position, click the stopwatch icon ( ) to create an initial keyframe for the Position property.
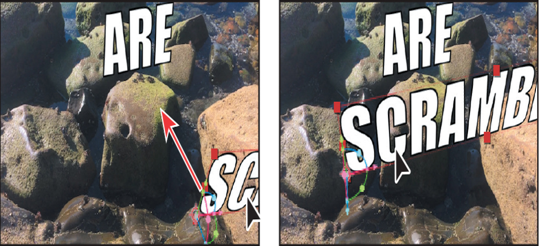
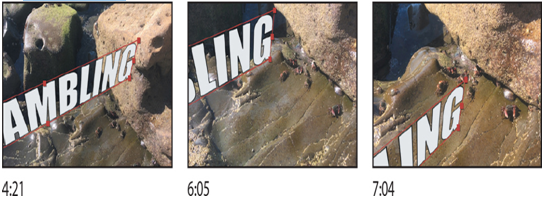
- Go to 4:21, and use the Selection tool to move the text as it appears in the image below. Then do the same at 6:05 and 7:04, so that the text continues to move down and toward the left.
The text is in position, but you want it to appear suddenly on the screen. You’ll trim the layers to stagger their appearance.
- Go to 2:03, select the ARE layer, and then press Alt+[ (Windows) or Option+[ (macOS). Then go to 3:10, select the SCRAMBLING layer, and press Alt+[ or Option+[ again.
- Hide the properties for all layers, and then choose File > Save to save your work.
- Press the spacebar to preview the text animation. Press the spacebar again to stop playback.