First, import an asset, and create the composition.
- Double-click an empty area of the Project panel to open the Import File dialog box.
- Navigate to the Lessons/Lesson11/Assets folder on your hard disk, and then select the Embrace.psd file. Click Import or Open, and click OK in the Embrace.psd dialog box.
- Click the New Composition button in the Composition panel.
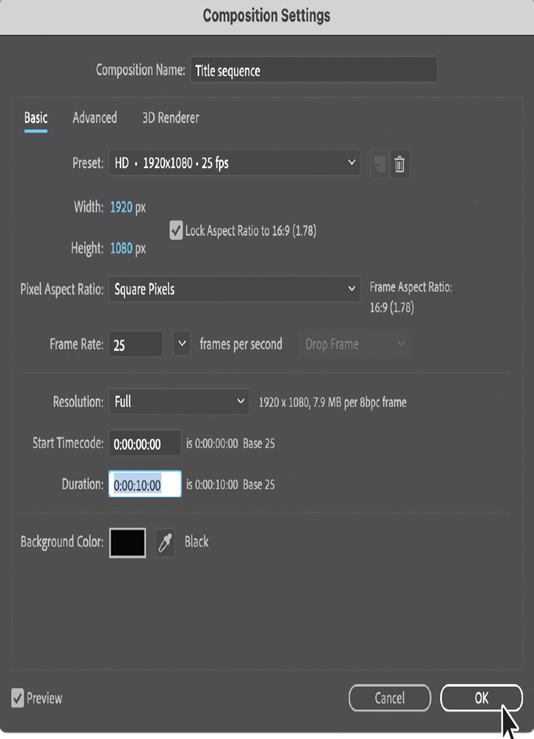
- In the Composition Settings dialog box, do the following, and then click OK:
• Name the composition Title sequence.
• Choose HD ♦ 1920×1080 ♦ 25fps from the Preset menu.
• Enter 10:00 for the Duration.
• Select black for the Background Color.
5. Drag the Embrace.psd file into the Timeline panel.
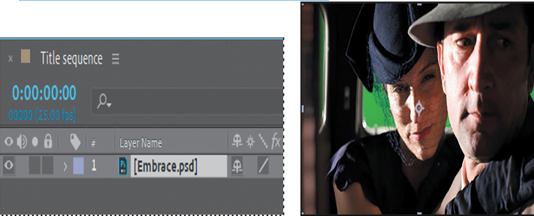
Displaying a background file will make it easier to position your text.
Adding animated text
The project includes a series title that appears at the top of the screen and moves down as it grows larger, and an episode title that appears letter by letter and then later explodes off the screen. You’ll create both layers and animate them.
- Select the Horizontal Type tool (
) in the Tools panel, and click an insertion point in the Composition panel.
After Effects adds a new layer to the Timeline panel and displays text attributes in the Properties panel.
Tip
For more information about installing fonts, see “Installing a font using Adobe Fonts” in Lesson 3.
- Type Shot in the Dark in the Composition panel.
- In the Properties panel, click next to the font name to open the font menu. If you do not already have Calder Dark Grit Shadow and Calder Dark fonts on your system, click Add Adobe Fonts, and then activate the fonts using Adobe Fonts. Or choose a different font in the following step.
- Select the text in the Composition panel, and then select the following settings in the Properties panel:
• Font Family: Calder
• Font Style: Dark Grit Shadow
• Fill Color: White
• Stroke: None
• Font Size: 140 px
• Tracking: 10 - Select the Selection tool ( ), and then position the title in the center of the top half of the scene in the Composition panel.

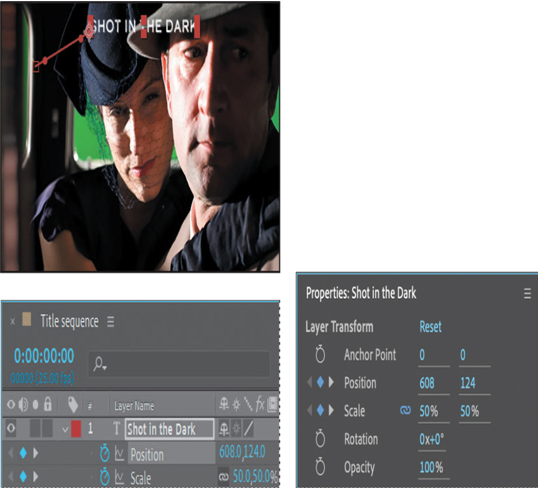
- Go to 2:00. With the Shot in the Dark layer selected, click the stopwatch icons next to the Position and Scale properties in the Properties panel to create initial keyframes.

- Press the Home key to go to the beginning of the time ruler. Change the Scale to 50%. With the Selection tool, drag the title so that it is centered at the top of the Composition panel. After Effects creates keyframes for the Scale and Position properties.
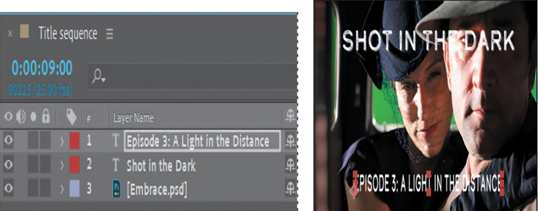
- Deselect all layers, and go to 2:10. Then select the Horizontal Type tool in the Tools panel again, and type Episode 3: A Light in the Distance in the Composition panel.
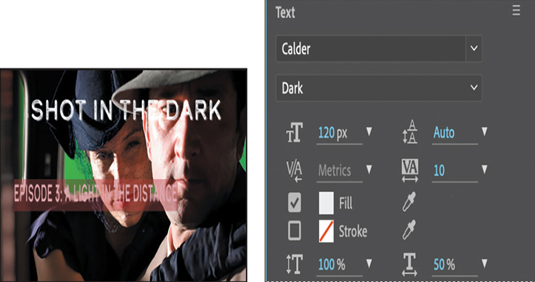
- Select the text in the Composition panel, and then make the following changes to settings in the Properties panel (click More to see Horizontal Scale):
Note
If you didn’t activate Calder Dark from Adobe Fonts in step 3, activate it now, or choose a different font in step 9.
- Font Family: Calder
- Font Style: Dark
- Font Size: 120 px
- Horizontal Scale: 50%
- Go to 9:00. In the Effects & Presets panel, type explosion in the search bar. Then select the Explosion 2 animation preset, and drag it onto the Episode 3 layer in the Timeline panel.
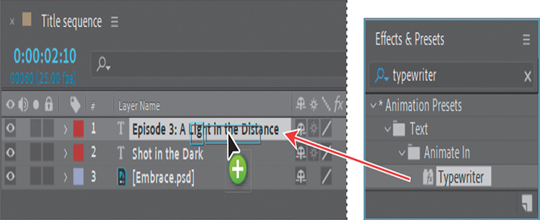
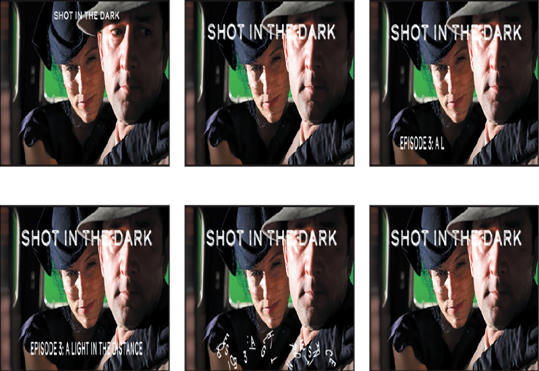
- Go back to 2:10. In the Effects & Presets panel, type typewriter in the search bar. Then select the Typewriter animation preset, and drag it onto the Episode 3 layer in the Timeline panel.
- Go to 9:00 again. Select the Selection tool in the Tools panel, and then center the text in the bottom third of the screen.
- Press the Home key or move the current-time indicator to the beginning of the time ruler. Then press the spacebar to preview the movie. Press the spacebar again to stop playback.
- Hide the properties for both text layers, and then choose File > Save to save your work so far.