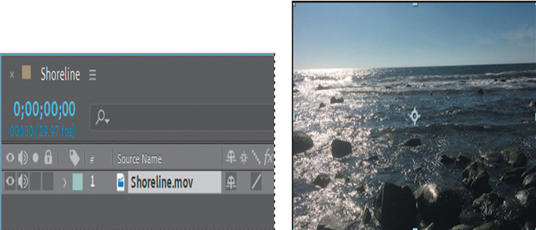
Now, you will create a new composition based on the aspect ratio and duration of the Shoreline.mov file.
- Drag the Shoreline.mov item onto the Create A New Composition button (
) at the bottom of the Project panel. After Effects creates a new composition named Shoreline and displays it in the Composition and Timeline panels.
- Drag the current-time indicator across the time ruler to preview the shot.
The camera moves around a beach scene, with a close-up of some scurrying crabs before it zooms back out to a shot of the ocean and rocks. You’ll add text, quotes for the crabs, and the company logo. - Choose File > Save to save the file.
Repairing rolling shutter distortions
Digital cameras with CMOS sensors—including video-capable DSLRs, popular for the creation of films, commercials, and television shows—typically have what is commonly known as a “rolling” shutter, which captures a frame of video one scan line at a time. Due to time lag between scan lines, not all parts of the image are recorded at exactly the same time, causing motion to ripple down the frame. If the camera or the subject is moving, the rolling shutter can cause distortions, such as leaning buildings and other skewed images.
The Rolling Shutter Repair effect attempts to correct this problem automatically. To use it, select the problem layer in the Timeline panel, and choose Effect > Distort > Rolling Shutter Repair.
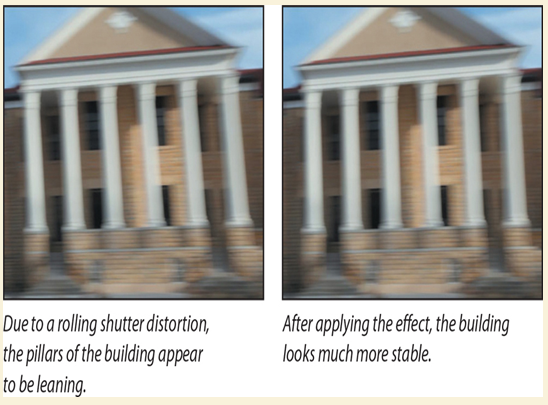
The default settings usually do the trick, but you may need to change the Scan Direction or the Method being used to analyze the footage.
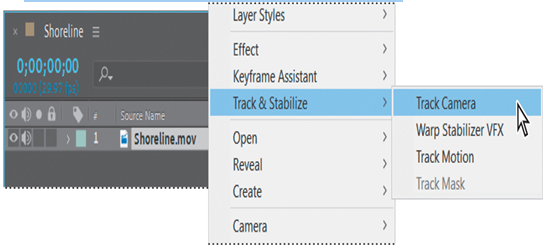
If you plan to use the 3D Camera Tracker effect with footage on which you’ve used the Rolling Shutter Repair effect, precompose the footage first.
Tracking the footage
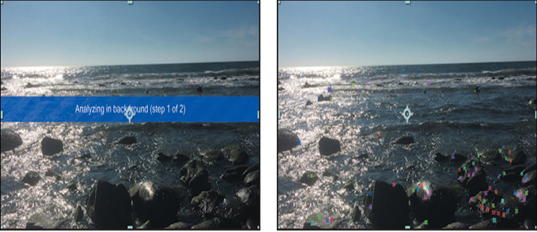
The 2D footage is in place. Now you’ll have After Effects track it and interpolate where a 3D camera should be placed.
- Press the Home key or move the current-time indicator to the beginning of the time ruler.
- Right-click (Windows) or Control-click (macOS) the Shoreline.mov layer in the Timeline panel, and choose Track & Stabilize > Track Camera.
After Effects begins tracking the camera and displays messages as it analyzes the footage in the background. When the analysis is complete, many tracking points appear in the Composition panel. The size of a tracked point indicates its proximity to the virtual camera: Larger points are closer, and smaller points are further away.
Tip
The default analysis is usually sufficient, but you can perform a more detailed analysis to better solve the camera position. The Detailed Analysis option is in the Advanced area of the Effect Controls panel.
- When the analysis is complete, choose File > Save to save your work so far.