A ground plane represents the ground relative to the 3D objects. Viewing the ground plane can make it easier to align objects and determine their relationships to each other. In After Effects, you can view the 3D ground plane when the Real-time Draft 3D preview mode is enabled. Real-time Draft 3D preview mode speeds up real-time playback in heavy scenes; it’s intended only for draft quality and not final output.
- Click the Draft 3D button at the bottom of the Composition panel to enable Draft 3D mode.
- Click the 3D Ground Plane button if it isn’t already enabled.
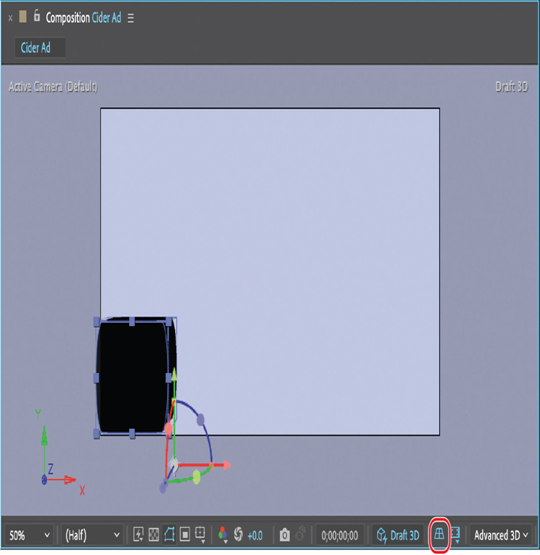
How much of the ground plane is visible depends on the camera angle. Currently, the camera is facing the front of the scene, so the ground plane isn’t visible.
When After Effects is in Draft 3D mode, if Extended View is selected, items on the pasteboard are visible. Keep the composition borders in mind so that you know what will be visible to viewers.
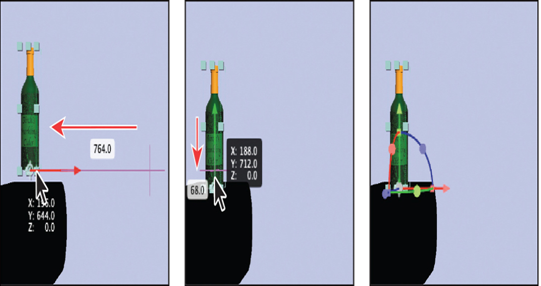
Using the 3D Transform Gizmo
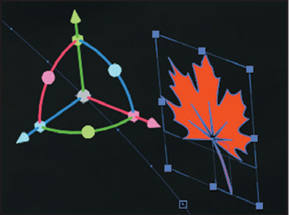
The 3D Transform Gizmo lets you manipulate the position, scale, and rotation of a 3D layer on the x, y, and z axes. The x axis is red, the y axis is green, and the z axis is blue.
To change the layer’s position, move the arrow for the appropriate axis. For example, to move a layer along the x axis, drag the red arrow.
To change the layer’s scale, move the square for the appropriate axis. For example, to change the scale on the y axis, drag the green square. Press Shift while scaling to scale uniformly in all directions.
To change the layer’s rotation, drag the cursor along the arc for the appropriate axis. For example, to change the rotation on the z axis, drag along the blue arc. By default, rotation moves in increments of one degree.
Importing 3D objects
You can import 3D objects in GLB, GLTF, or OBJ file formats into After Effects projects. Materials applied to those objects in other applications are included with the imported objects, though you cannot edit the materials in After Effects. However, you can modify the position, size, and orientation of 3D objects in After Effects.
- Choose File > Import > File.
- Navigate to the Lessons/Lesson12/Assets folder, and select the Bottle.glb file. Click Import or Open.
A folder containing the Bottle.glb file appears in the Project panel.
Note
When you add an imported 3D object to a composition, After Effects automatically changes the renderer to Advanced 3D if it isn’t already selected.
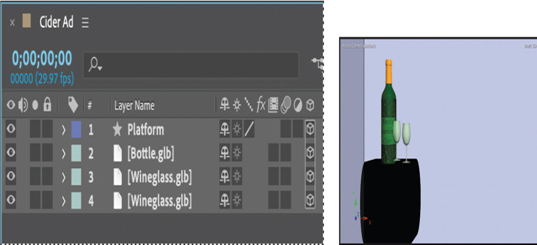
- Drag the Bottle.glb file into the Timeline panel.
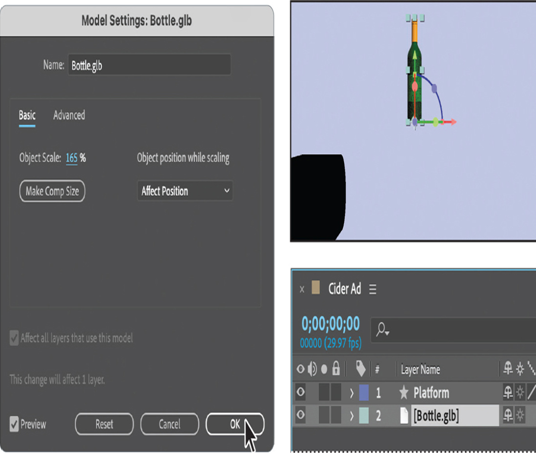
The Model Settings dialog box opens. When Preview is selected in this dialog box, you can see how changes affect the object you’re adding to the composition. - In the Model Settings dialog box, change the Object Scale to 165%, and click OK.
- Make sure the Bottle layer is selected in the Timeline panel.
- Using the Selection tool ( ) and the 3D Transform Gizmo, drag the bottle so that it is resting atop the platform.
- Double-click an empty area in the Project panel to open the Import File dialog box again. Select the Wineglass.glb file in the Assets folder, and click Import or Open.

- Drag the Wineglass.glb file into the Timeline panel.
- In the Model Settings dialog box, change the Object Scale to 230%, and click OK.
- In the Timeline panel, select the Wineglass layer, and choose Edit > Duplicate.
- Move the wineglasses next to the bottle on top of the platform. Your values will probably differ from ours.
- Hide the properties for all layers, and save your work.